![]()

![]()
The Astart Stoplight, designed by the Interway Authority, is a realistic timed stoplight that is highly configurable. Rather than have a static animation of a stoplight, the Astart Stoplight will be green for one road and red for the other. This tutorial details for citizens of AWTeen how to build their own Astart Stoplights. The stoplights are not perfect, but they still look cool. Examples of these stoplights can be found at several intersections on Broadsword Highway in AWTeen.
![]()
"Up One" denotes one press of the or "+" key to raise an object. "Ten Down" denotes ten presses of the "up arrow" key to move an object down. "Shift+Forward two" denotes the key combination shortcut for moving an object forward a small amount one time. "Ctrl+Shift+Back one" denotes using the key combination to move an object a tiny amount backwards one time.
![]()
The design of your stoplight housing, whether it is an all in one unit that hangs by cable in the middle of the roadway, or a multi-unit version, with one stoplight unit on a metal pole for each lane, or any combination of that is completely up to you. With the available materials, I have found the metal pole and individual unit combination to be the best choice in AWTeen. I will detail how the Interway Authority constructs these stoplight systems. This is easiest to demonstrate using pictures, so this section of the tutorial is accessible by clicking on the thumbnail below.

Note that I extended the cyl8a by creating a second and extending it as far as needed. To prevent z-buffering, move the second cyl8a ctrl+shift up one and then ctrl+shift back one.
![]()
After copying and "One Backing" your bmv01m_m.rwx for your stoplight so it sits right on top of the other, change it to object pokeball.rwx, with create color black. The pokeball should appear peeking out of the bottom of the stoplight. Go Shift+Down five times and then Shift+Up four times and the black light will be in the green position. Copy it, put it in the same place by going back one. and then move it up shift+up six times, to place it in the yellow position. Copy and replace again, and go shift+up six again to place it in the red position. You should now have a stoplight with black bulbs. You can now copy this across your pole if you need more than one stoplight if your road has more than one lane for each direction. If you have a left turn lane, also copy one for that lane. I will go into left turn lights later.
For all but the left turn light (if you have one), copy the three black pokeballs right one, such that they are right beside the stoplight, as shown in the image below. Then bring them forward ctrl+shift one time. This is an important step to prevent z-buffering when the lights are working. Delete the create color black out of all three of these copied pokeballs, as we will be adding the commands to light them later.

![]()
For this section, download stoplight.txt (right click and hit save target as). There are a lot of commands in here, for this tutorial we are only interested in the red and green phases for intersection number one.
Decide whether you want the stoplight you are building in this tutorial to start out green or red when people teleport in. I like the larger road in an intersection to get the green first, and the smaller one to start out red. If you want the stoplight set you are building to start out red, then use the red phase section, if you want it to start green than use the green phase set of commands. Whichever one you choose for this stoplight set, you must use the other one for the other stoplight set you build.
This is actually pretty straightforward, each line in stoplight.txt goes to a lightbulb, and the fourth command goes to the front wall12.rwx that you placed on the pole. The organization of my text file is green bulb code, yellow bulb code, red bulb code, and wall12 code. See the image below for a graphic explanation of what goes where. Usually, builders tend to hide the trigger underground, but in the real world, those boxes are actually the stoplight computer, so it made sense to do the same in AWTeen.

Once you do this, teleport out of the area and back again and the lights should be working. Wait ten seconds if something does not seem to be working, since sometimes the lights don't fire for the first cycle.
You have now made your first Astart Stoplight!
![]()
Now, you need to copy the entire stoplight and rotate it for the other direction of traffic on the road. Ctrl+select is the easiest way to do this. Once you get it copied for the other direction of traffic, be sure to delete the wall12.rwx command for one of the wall12.rwx, since you do not want two triggers for the same sequence.
![]()
Now copy one of your two stoplights and place one for the other road. You must now replace the action commands in the lights and the wall12.rwx for this stoplight. Use the phase commands out of stoplight.txt that you did not use for the other one. Then you can copy it for the final part of the intersection, and delete the command out of its wall12.rwx. Teleport out and in. You should see a working intersection.
![]()
I took the easy way home with these. It was waaaay to complex to figure out how to time everything so that the left turn worked realistically, so I just made a flashing red light. Note that led1 texture will not work on pokeball. We must manually animate the light. Rather than bother using astart for this, I just used create move. Take the top black pokeball on the left turn light, and copy it and put it right on top of the original. Then ctrl+shift back two times. Note the direction that the light is facing (not you) and copy the appropriate left turn code from stoplight.txt. The left turn codes are at the bottom of the text file.
![]()
Left turn lights are static, and just flash constantly.
If objects load at different times, the cycles may not match up.
Yellow phase on stoplights is not realistic... lights turn green for opposing traffic before the lights are red.
Sometimes some lights will be black for the first ten seconds after you enter the area.
Despite these bugs, I feel that these stoplights are more sophisticated than other methods, and these bugs do not overshadow the interest in having working stoplights. If anyone wants to spend weeks of their lives creating a better timing scheme or whatever, that would be cool... let me know if you come up with something and I will add it in and give you credit.
![]()
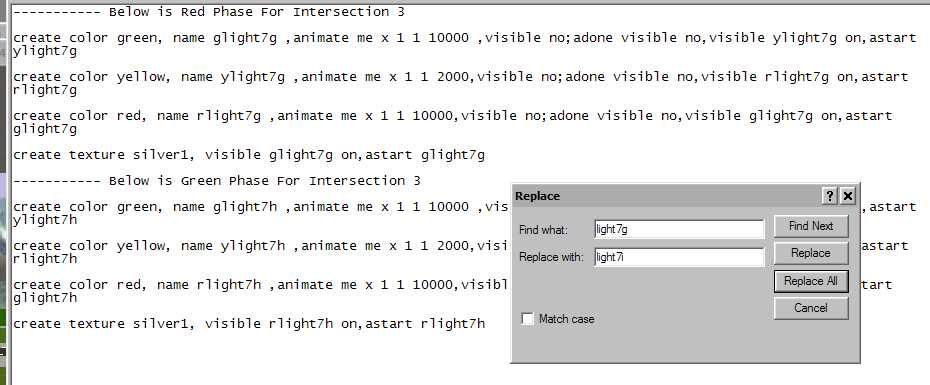
Due to the fussy nature of the astart system, I recommend using different names and triggers for each intersection within a 200m range, so that nothing is in conflict with each other. I have provided enough commands in the text file for four intersections, if you want more, I recomend copying one of the intersection templates into a new Notepad document, and using the find/replace command to rename the triggers and objects. Change the last letter in the names to the next unused letter in the alphabet to get a new template for an additional intersection.
![]()
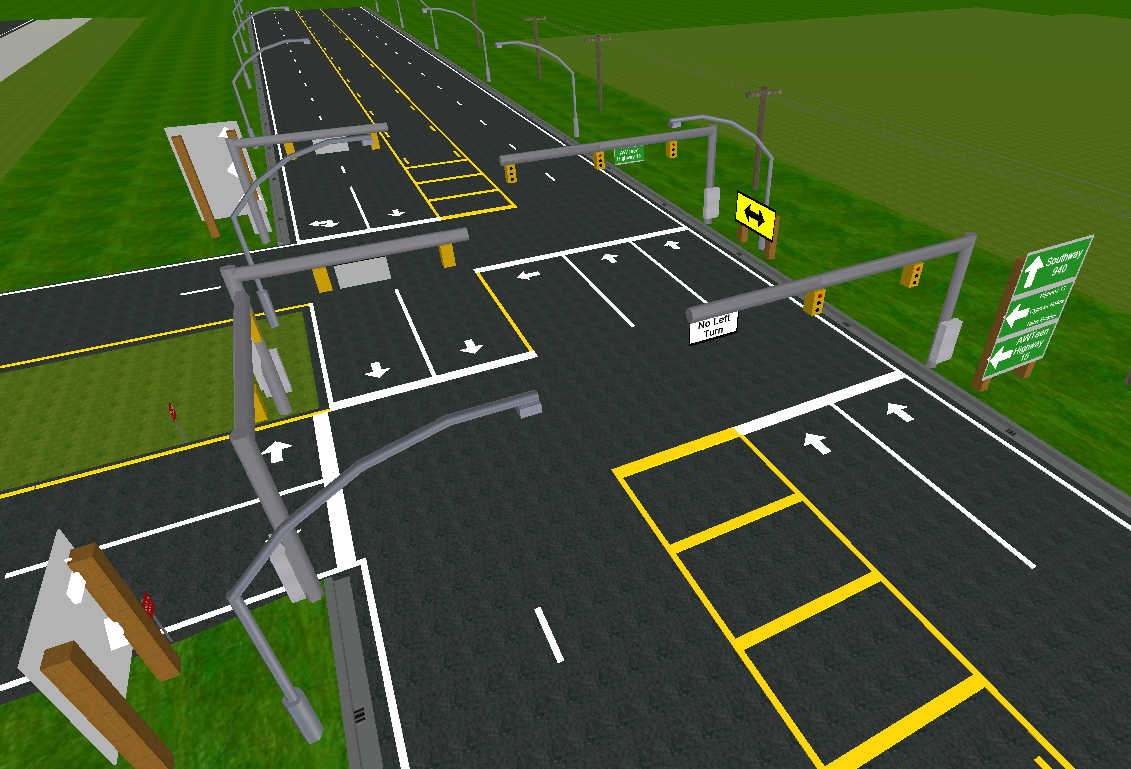
I always use the custom-built roadway these days on my roads, and if you do also, you may want to put some lines in and some arrows in. Up.rwx works really well for turn arrows on the pavement, just rotate it so it lays on the ground. I always put the arrows and lines on my roads so that they are "ctrl+shift up four" above the asphalt road. Different countries, states, and even counties and cities vary slightly in their line configurations. Also, different unusual situations, like one-way roads and such may create need for different things. Check out some of my intersections as a guide, or look around in your own real-world for ideas. I have included a couple screenshots of intersections I built to get you started. You will find that I have experimented with a few different variations. I use wall12, wall001, and wallh01l for line construction. If you turn wall12.rwx on its side it makes a good short dotted line, which is sometimes used on stop lanes and onramps and such. Wall12.rwx when not rotated is longer, and I use that for the actual centerline or lane dividers. I make stoplines, the big white lines that tell you where to stay behind, either three or four wall001's wide. I do not recommend ever using any of the bmv01m_m.rwx or bmh01m_m.rwx type objects for lines because they do not light properly, and often the white lines will look grey.

![]()
![]()
|
|